You want to know how to take horse photos? As a professional horse photographer, I understand the draw to capture your horses, or any horses, in photos. Whether you have a cell phone or a DSLR, you will find something here to get you started, or improve, your horse photography.
Cell Phone or DSLR?
I’ve taken great photos with my Iphone and great photos with my Nikon DSLR. I used an old Nikon D40 for YEARS and still have it as a backup as it still takes incredible photos. I upgraded to a Nikon Z6II which is a mirrorless camera.
With the quality of cell phone cameras these days though, great pictures can be taken with them. However, if you ever want to take professional horse photos, a DSLR will be a must.
If you have or will get a DSLR, my favorite lens for shooting every day is a Nikkor 55-200 mm, 4-5.6. I also use a macro lens occasionally for up close shots of eyes.
I am not going to get into the lengthy and technical aspects of how to take horse photos in this article, with regards to aperture, shutter speed, and ISO, but instead will stick to more of the basic horse photography concepts that will make your photos better day in and day out.
20 Tips for How to Take Horse Photos
- Tip 1: Introduce the camera to the horse. Whether it is your phone or a bigger camera, let the horse see it and, if possible, smell it. Whether it’s my own horses, or if I’m taking photos of a friend or client’s horse, I always let them see and smell the camera. Horses are curious by nature, but often their curiosity is about making sure that you, and whatever you are holding in your hand, aren’t a threat. Just don’t let them take a bite out of it.
- Tip 2: Consider the flash. A flash can spook a horse if they aren’t expecting it. If you don’t need it, turn it off. Or don’t use one at all on a digital camera. If you need to use one due to the lighting in the environment, shoot it off a few times around the horse or horses to gauge their response. I almost never use a flash when shooting horse photography, but most of my photos are taken in natural light.
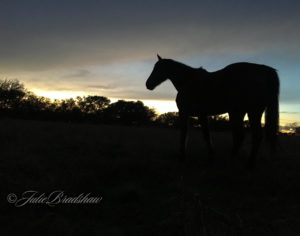
- Tip 3: Lighting behind you. (Most of the time anyway.) If you’re in an outdoor arena, out in the pasture or paddock, or even in a barn, having the sun, or artificial light, behind you will usually give you the best photo. If looking for a profile shot, then having it behind the subject will be the best course of action. For instance, this photo of Scout was taken with my Iphone at sunset.
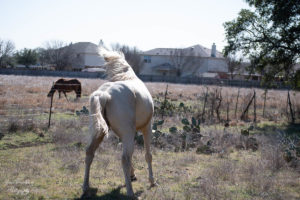
- Tip 4: Choose sunrise or sunset whenever possible. This follows up from Tip 3. With the sun on the horizon at both sunrise and sunset, this provides that softer light that you can put behind you and vastly increases the chances of a beautiful horse photo. Photos taken outdoors at mid-day with no shade or filtering, will wash out a subject with too much light. This photo of Ankh shows you what I mean by this.
- Tip 5: Rule of Thirds. This is a well-known photography concept. To break it down, it essentially says you want to have something of interest in every third of the photo. The key here is “something of interest.” While your subject is key, you also want to pay attention to what is in the other two-thirds of the photo. It’s not only the subject itself that makes a great photo. And the subject itself doesn’t always have to be in the center of the photo. As seen in this photo of Magic, my Peruvian Paso mare, Magic is on the left and in the center, in the photo. She takes up the first two thirds of the photo. In the other third of the photo, the trees and pasture in the background are soft, but still support the photo of her. With her coming in from the left, it makes you feel as if she walking towards you.
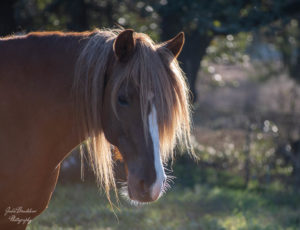
- Tip 6: Depth of Field. This photo is also a great example of the Depth of Field. If you want to know how to take horse photos, you need to understand Depth of Field. It is the distance between the closest and farthest objects that are at least somewhat in focus in the image. In this case, the focus is on Magic and the background is blurry. This is a shallow depth of field. This is commonly used with portrait photography but in this photo the portrait is of Magic. The photo below of my horse Ankh under the trees has a deep depth of field. Everything in the photo is in focus.
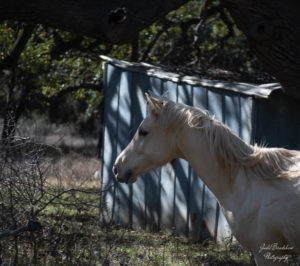
- Tip 7: Proper amount of lighting. Although I’ve touched on the location of lighting, the amount of and type of lighting are just as important. Too much light or too little light will create harshness or too many shadows. If using post-editing software such as Lightroom Classic or Photoshop, some highlights and shadows can be adjusted. But when you’re able, keep in mind the overall quality and amount of lighting in your photos. Filtered lighting, such as light coming through the trees with the picture of Ankh above, can turn your photo from plain to awe-inspiring. Become friends with your lighting, find a way to work with it and not against it.
“The Eye” for How to Take Horse Photos
Having the “eye” for photography seems like it comes so naturally to some. But I’ll tell you a secret, “the eye” comes from taking lots and lots of photos. I was taking photos when I was a teen. And although I went years without picking up a camera at times, every single picture you take improves your eye. This makes your horse photos improve with every single shot.
- Tip 8: Take photos every day. Yes, even if it’s only ONE photo. Take a photo of SOMETHING. It doesn’t have to be a horse, if you don’t see a horse every day. Every photo you take will improve your eye.
- Tip 9: Get on eye level with your horse. This is mainly used when shooting from a distance. But kneel down or sit on a mounting block and shoot from the horse’s eye level (assuming they are grazing or have their head low, of course.) This image of Magic I took while on eye level with her.
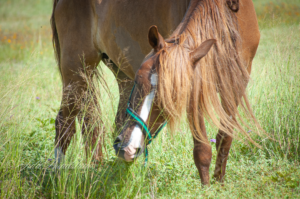
- Tip 10: Get close up. Some of the most artistic shots I’ve taken have been while I’m up close to the horse. This photo of Ankh was taken while standing right next to his hindquarters. The photo below that was taken from in front of my horse while he was grazing. It doesn’t have to always be the whole body or head. Get creative!
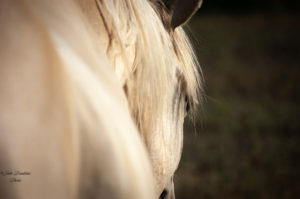
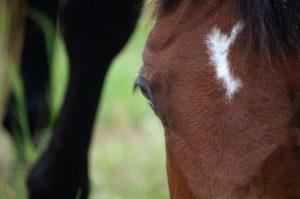
- Tip 11: Shoot from Above or Below. If your horse is comfortable with you standing over them or even under them (assuming you are safe to do so), these angles can provide some amazing shots as well. I took this photo standing slightly over Ankh recently while he was grazing.
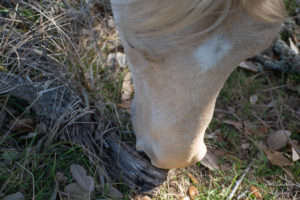
- Tip 12: Photograph everything they do. OK, maybe not peeing or pooping, LOL, but everything else. Grabbing a shot of them reaching back to bite a fly can provide a beautiful shot. Rubbing their face on their leg, or their tail on a tree or fence post, can provide unique and fun shots. This photo I took of my Morgan gelding was of him scratching his neck on a tree.
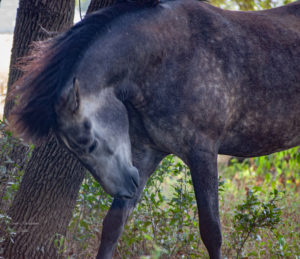
- Tip 13: Timing is everything. As a followup to Tip 12, timing in horse photography is everything. It can mean the difference in a humdrum shot and a “take your breath away” shot. Be really, really sure that you can’t get a good shot before you take your finger off the button.
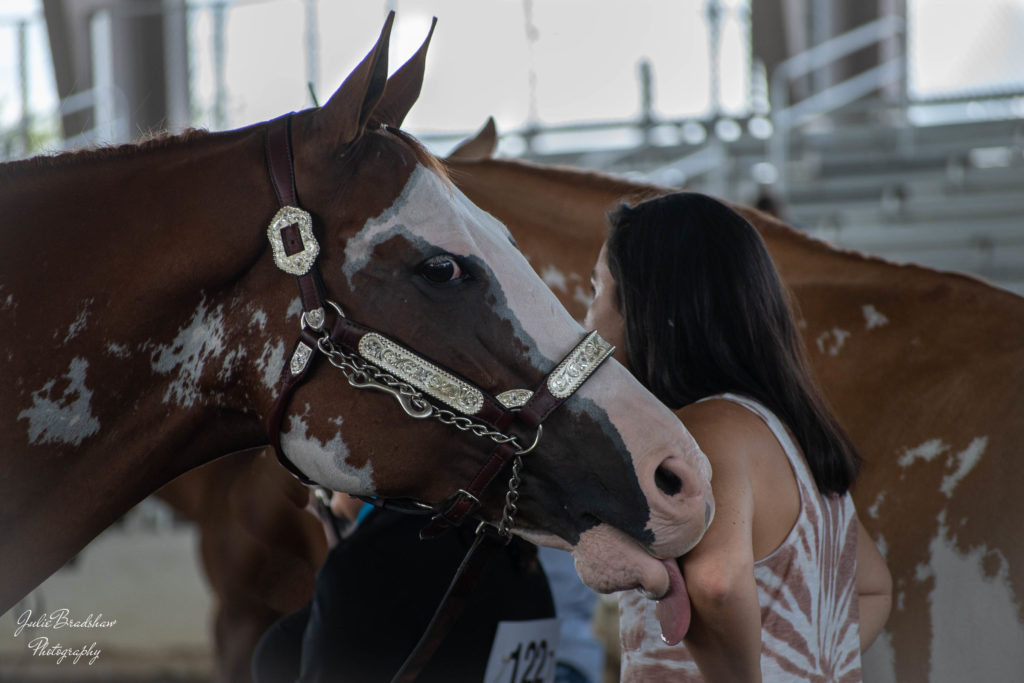
- Tip 14: Go behind the scenes. If you’re taking photos of people and horses, look for the funny or special moments. If you’re taking photos at clinics or events, don’t limit your photography to the actual jump, or obstacle or water feature. Watch for people talking to one another while their horses are there. I took this photo of a horse that kept licking his owner’s arm at a horse show. He would stop and look at me and then keep licking. Best photo of the entire day in my opinion.
How to Take Horse Photos Summary
The very best tip on how to take horse photos in this list? It is Tip 8. If you take photos every day, whether of horses or a flower growing from a crack in the sidewalk, your horse photography will improve by leaps and bounds. The more photos you take, the better you get.
